Before and AFTERS: Precision Brow Planing
Whether your brows are thin, hooked, shapeless, full or bald the Precision Brow Planing Lesson can help every brow type.
|
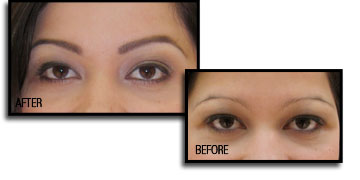 |
THIN BROW
- By applying the brow map, we showed her where the beginning, arch and end of tail are creating a customized brow for her facial structure.
-
Applying Adda Brow first holds the little bit of Dark Brown eye shadow that gives the brow the color it needs.
|
|
|
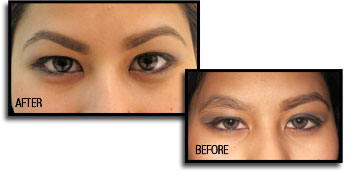 |
SHAPELESS BROW
- Notice the difference in the after, by removing a little more hair than just strays it lifted her eyes.
-
Applying Adda Brow and Dark Brown eye shadow gave her brows just the right amount of color they needed.
|
|
|
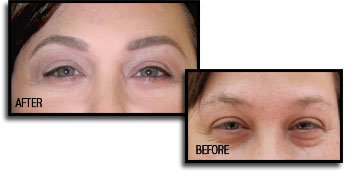 |
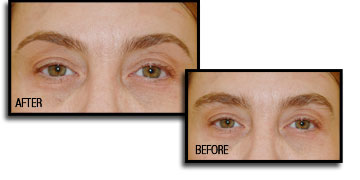
SHAPELESS & BALD BROW
- Notice in her before how sparse her brows are and they don't really have a shape to them. By applying the Precision Brow Planing steps she is able to create a natural brow with what she already had.
-
Applying the Eye Lift Highlighter directly underneath and above the brows enhances the arch and highlights the brow bone.
|
|
|
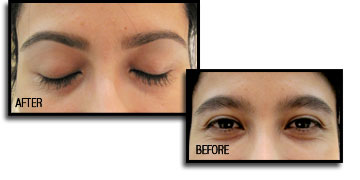 |
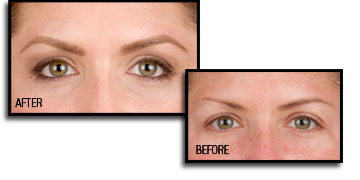
FULL & SHAPELESS BROW
- Notice the difference in the after, by removing a little more hair than just strays it lifted her eyes giving a more youthful appearance.
-
Applying the Eye Lift Highlighter directly underneath and above the brows enhances the arch and highlights the brow bone.
|
|
|
 |
FULL BROW
- Notice the difference in the after, by removing a little more hair than just strays it lifted her eyes giving a more youthful appearance.
-
Applying the Eye Lift Highlighter directly underneath and above the brows enhances the arch and highlights the brow bone.
|
|
|
 |
THIN BROW
- Since she didn't have much hair to begin with, using the Precision Brow Planing System brow map we were able to show her where the beginning, arch and end of tail are placed. Adda Brow was stippled in place creating a hair like texture for natural brows.
-
Applying the Eye Lift Highlighter directly underneath and above the brows enhances the arch and highlights the brow bone.
|
|
|